In Word a table of contents (TOC) automatically includes the major headings in your document. Word provides templated automated tables of contents that are quite handy to use. We'll look at this automated TOC in this article.
Note: You can add a custom table of contents which is explored in this intermediate-level article: Custom table of contents.
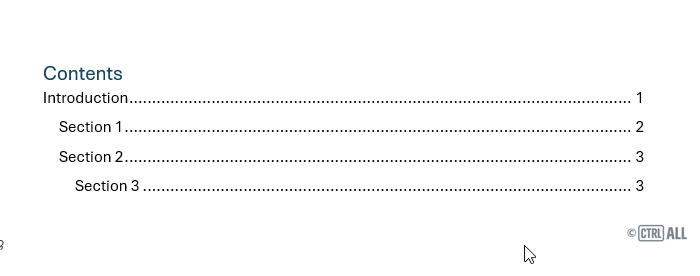
Word's automated TOC are useful because they provide a link directly to the location of the entries within them, take a look:
How to insert a table of contents
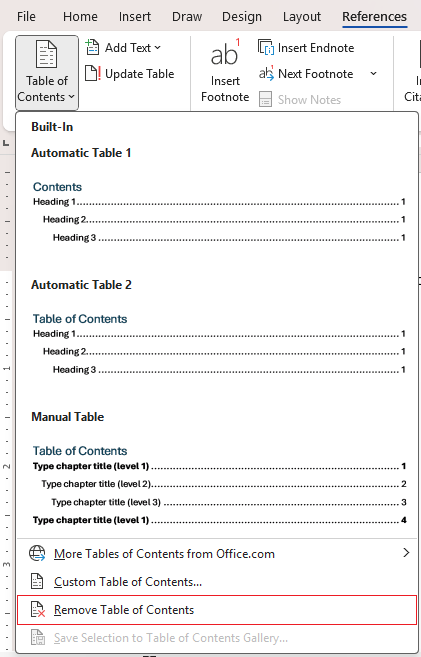
To add a table of contents go to Reference > Table of Contents.
You'll get a drop down menu which has a few templated tables of contents.
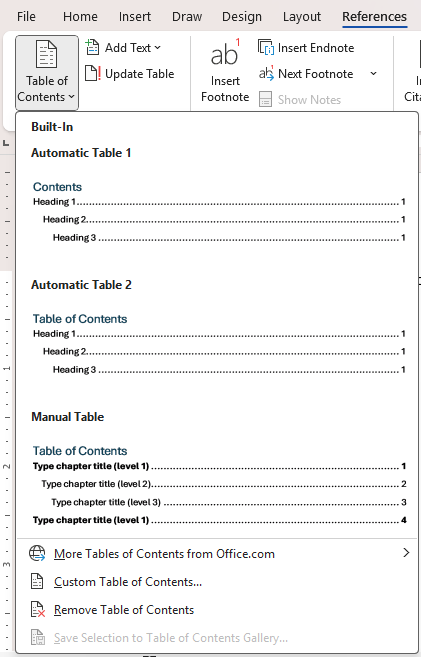
Click the top one Automatic Table 1 and a TOC is inserted where you had the insertion point:

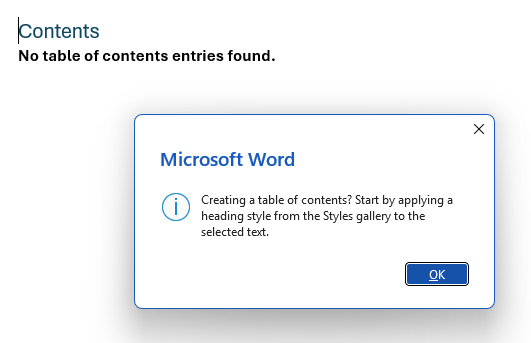
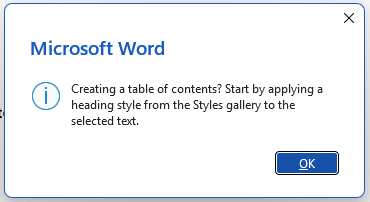
If you don't have any headings you'll get this message:
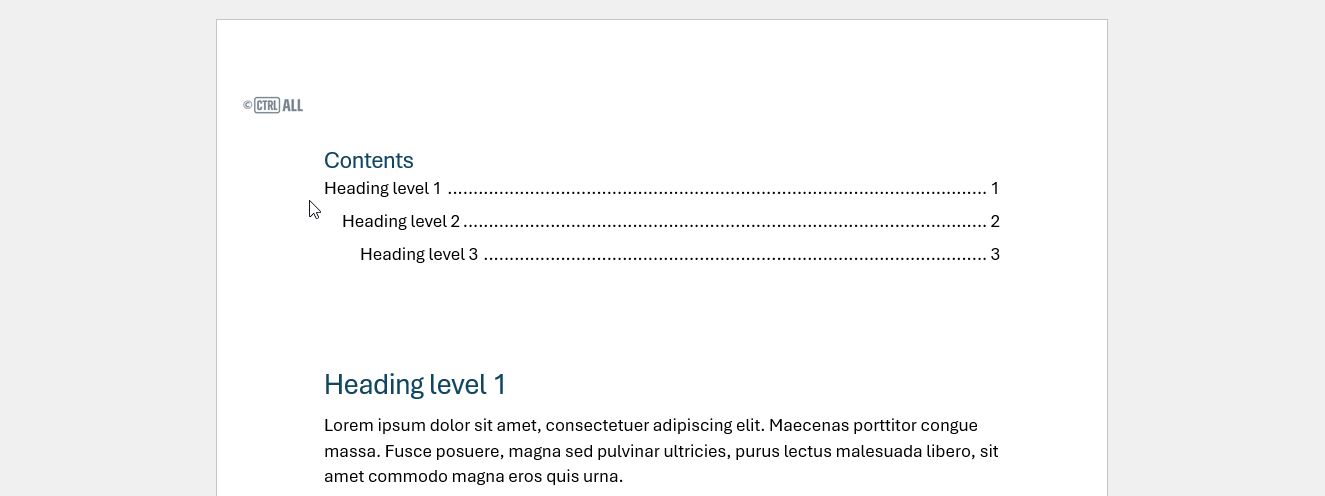
And a blank table of contents that looks like this:

Remove a table of contents
If you have a table of contents that spans a whole page or more it can be tricky to select all of it to then delete it. Instead there's a button that can do it for you. Go to Reference > Table of Contents > Remove Table of Contents:
How to update a table of contents
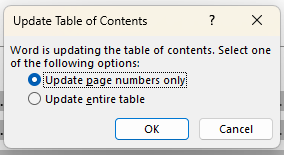
If you add, edit or delete a heading you'll need to update your table of contents to reflect the change. Even though it's called an 'Automatic table of contents' they don't update automatically in Word unfortunately. You need to update TOCs manually.
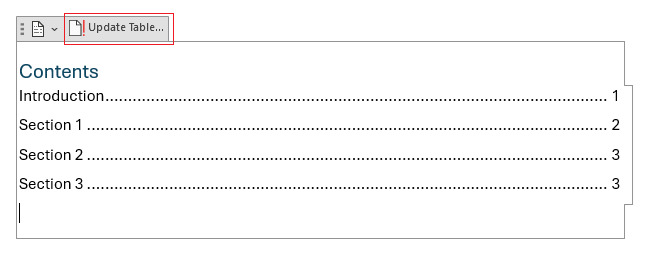
To do this go to the top of the TOC and click on it. You'll see an Update Table button at the top, click this.
A window pops up with the choice to update just the page number or the whole TOC. I'd always recommend selecting the whole TOC to capture everything. Click OK when done:
The table of contents will then update. Here's a demonstration:
Understanding heading levels
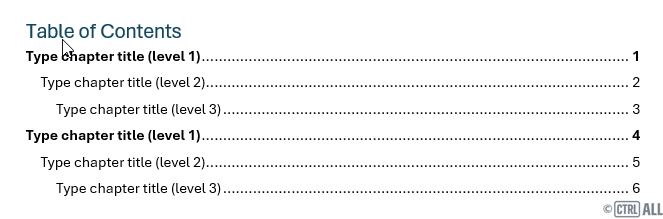
You might notice on some TOCs that some entries are indented:
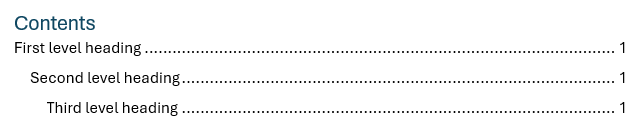
This is due to heading levels where a heading has a certain style applied that has a heading level assigned to it. For the above example TOC here's what the headings looks like:
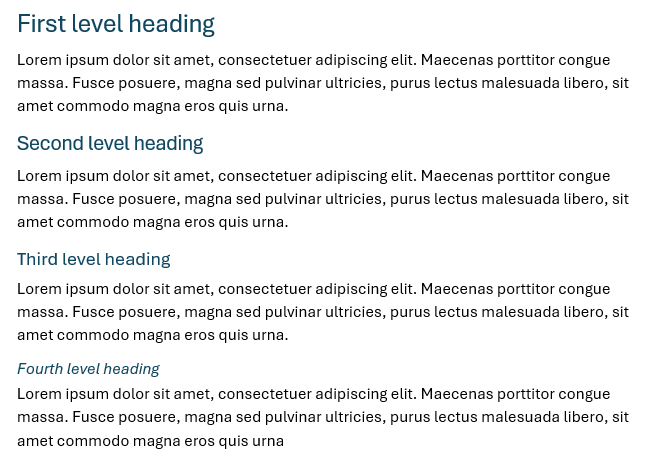
Note how the fourth level heading doesn't show. An automated TOC only shows the top 3 headling levels.
Where do I find heading levels and how do you set them?
Go to Home > Styles and click the far right button:
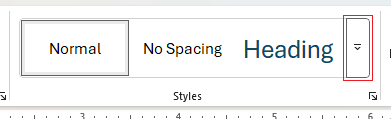
This expands the Styles Gallery to show all the default styles for your document (if you're using a template you might have custom styles already set up). For a blank default page you'll see heading styles like this:
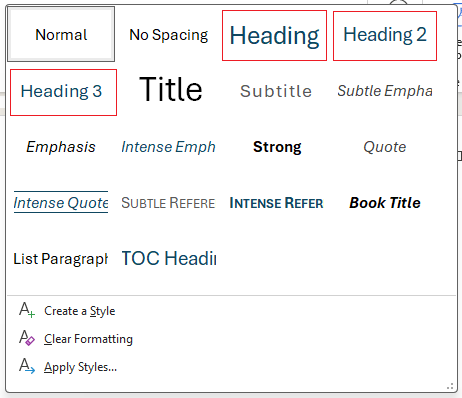
Note: You might just see Heading 1 and Heading 2 at first. If you apply those heading styles the other levels tend to appear afterwards.
Where to now?
- More on tables of contents are explored in the intermediate version of this article such as:
- Table of content options
- Table entry fields - 'TC' fields - to add anything into a TOC
- Modifying TOC styles
- If you're wanting to insert a custom table of contents have a look at this intermediate-level article: Custom table of contents