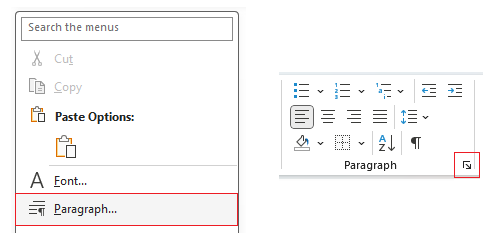
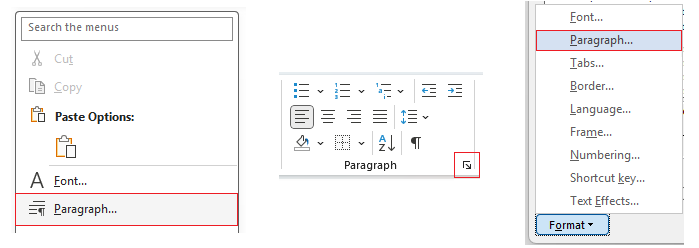
The Paragraph options window let you determine all the layout of a paragraph in terms of spacing, indentation, alignment and more.
Indents and Spacing
Initially you'll be shown the Indents and Spacing tab first. (For the Line and Page Breaks tab options here.)
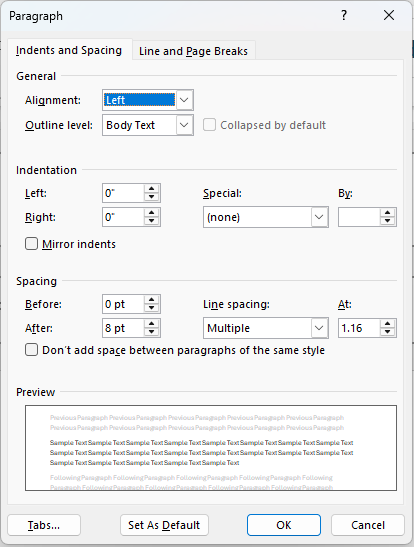
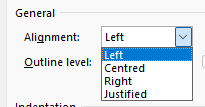
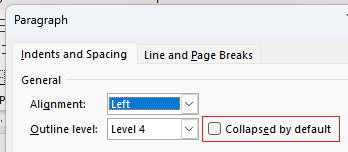
Alignment
Alters the alignment of the paragraph with the standard options: Left, Center, Right, Justified.
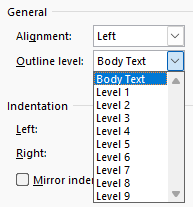
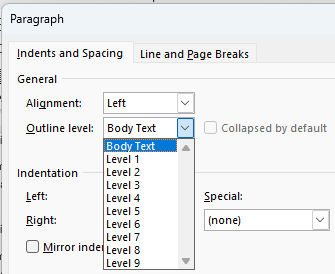
Outline level
The Outline level determines a hierarchy order for a whole paragraph. On the drop down you'll see Levels 1-9 and Body Text:
- Levels 1-9: These are treated as heading levels. Level 1 is the highest (most important), Level 9 is the lowest.
- Body text: Default for normal paragraphs, you would want this for text which should not be treated as a heading.
Changing the outline level of a paragraph has the following affects in these areas:
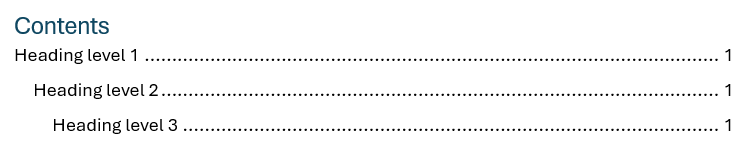
Table of Contents: By default levels 1-3 will show up as headings in a table of contents which become links to the location of those headings in the document. You may have noticed applying the styles 'Heading 1', 'Heading 2' and 'Heading 3' on text make it appear in a TOC; this is because those styles have an outline level.
Note: Level 4-9 won't show up on a TOC unless you explictly change it in Table of Content options.
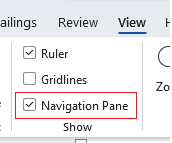
Navigation Pane: Levels show up as headings on the navigation pane which like a TOC you can click to go to its location in the document. Open it via View > Navigation pane.

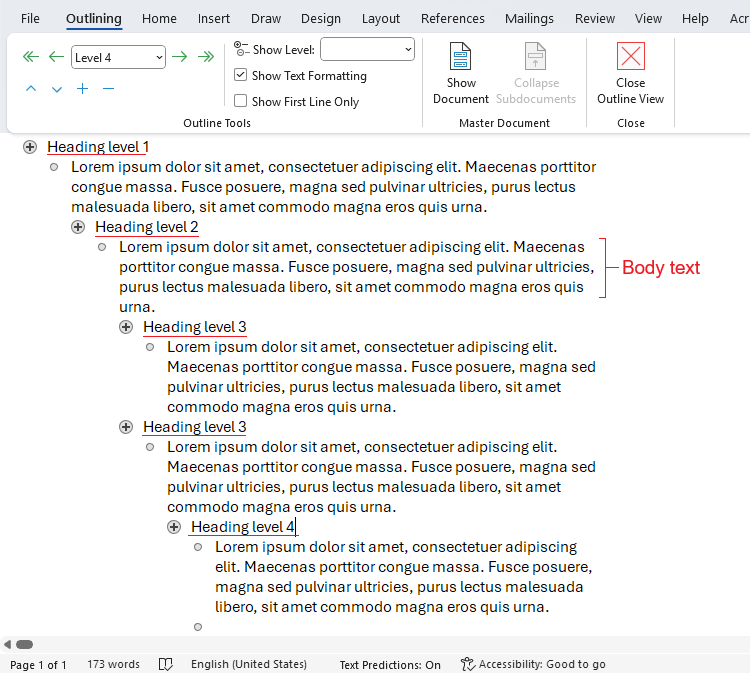
Outline View: If you switch to View > Outline, paragraphs with different outline levels appear as collapsible headings or body text, they are indented differently based on what you choose.
Collapsed by default
The 'collapsed by default' checkbox to the right affects whether the paragraph or heading is collapsed or expanded in the Outline View and the Navigation Pane. Note: It doesn't affect the content on the printed page or a Table of Contents (TOC).
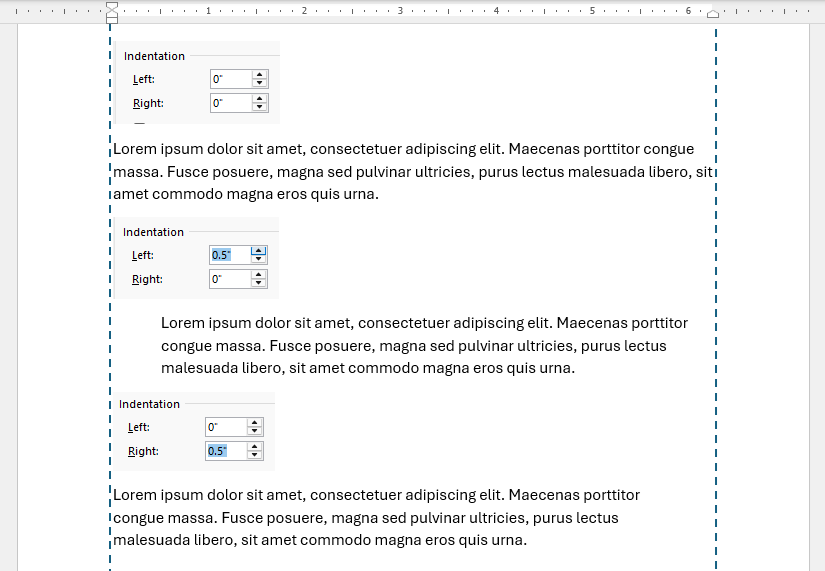
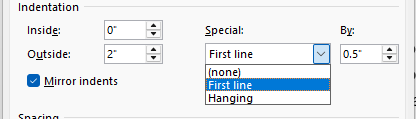
Indentation
Here you can alter the indentation of the paragraph. For more on indentation see the Indents article and try out the interactive examples showing how to modify indents via indent markers on the horizontal ruler.
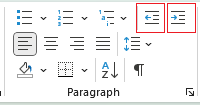
Left and Right
Literally applies indents on a paragraph from the left or from the right.
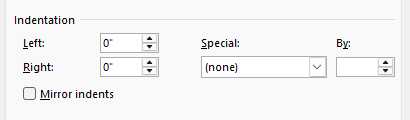
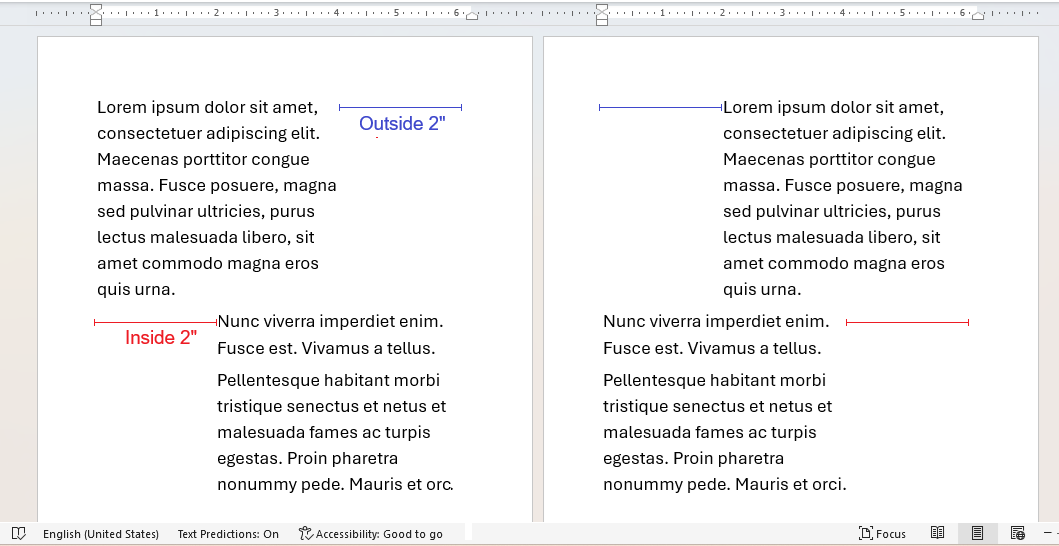
Mirror indents
Checking the Mirror indents checkbox below changes the Left and Right options to Inside and Outside.
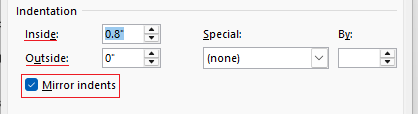
These are to do with the layout of margins for paragraphs on opposite facing pages, for when you're holding a double sided report, book or magazine open. Use this if you want paragraph indents mirroring each other on opposite pages in terms of being indented closer to the spine where the pages meet ('inside') or further from the spine towards the outer edge of the pages ('outside').
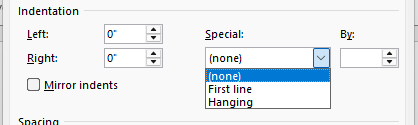
Special / By
Use the Special drop down menu if you specifically want to change the First line indent or Hanging indent. Once selected you can alter how much to indent by with the By field. More on these different indent types is explained with interactive examples here: Indents.
Spacing
Spacing allows you to increase or reduce spacing above and below a paragraph and in the lines themselves.
Before and After
Alter the vertical spacing before or after a paragraph in points.
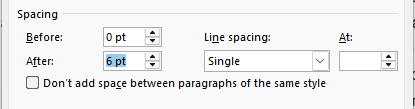
Peronally, this spacing is something that I find myself altering for individual paragraphs all the time. Sometimes you just need more or less space before or after a specific paragraph, image or object in order to fit content on the page or simply for aesthetics when it could look better. Before and After this lets you tweak it individually and discreetly without having to resort to altering entire styles.
Don't add space between paragraphs of the same style
Typically this is checked to retain spacing between same-styled paragraphs. If you uncheck it, then it applies the Before and After spacing to the selected paragraph.
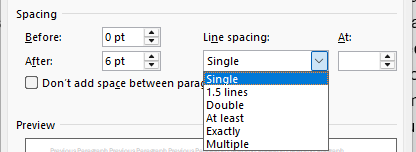
Line spacing
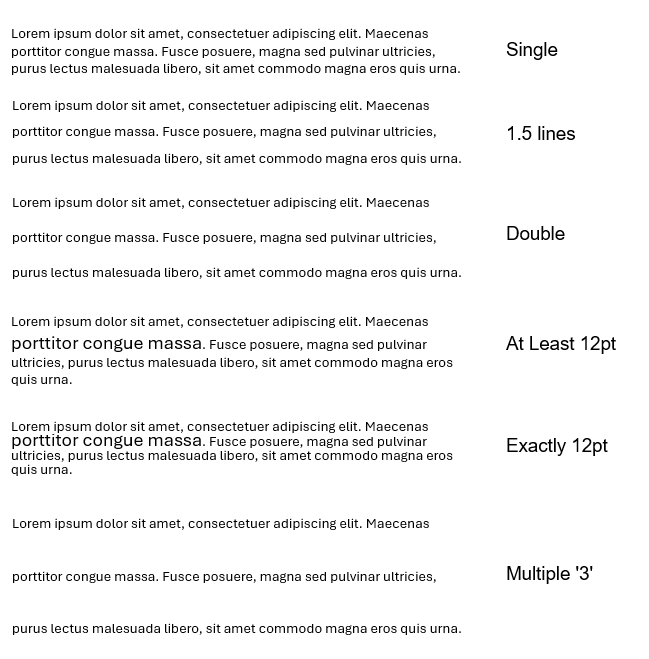
Click the Line spacing drop down menu for different types of line spacing, some of which you can specify in points in the At field. Here's each option explained with examples further below:
| Option |
What it does |
Example |
| Single |
Minimal space between the lines. |
Business letters, Resumes/CVs, Compact reports. |
| 1.5 Lines |
Add 50% more spacing than single spacing. |
Internal memos, school assignments. |
| Double |
Doubles the spaces between lines. |
Academic essays, theses or manuscripts so an assessor or editor can write comments or corrections between the lines. |
| At Least |
Sets a minimum spacing in points. Word will increase spacing if needed to fit larger text or inline elements.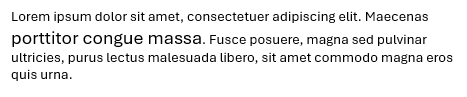 |
Docs with mixed font sizes or inline graphics like technical manuals or marketing flyers. |
| Exactly |
Fixes spacing to a specific point size (pt) regardless of the font size. Word does not adjust it even if the text or graphics need more room. |
Forms, legal documents or layouts where precise spacing is needed. |
| Multiple |
Sets spacing as a multiplier of single spacing (e.g., 1.15, 1.75). It adjusts dynamically with font size. |
Corporate documents, professional reports, books, magazines where visual balance matters. |
Here's them altogther for easier comparison:
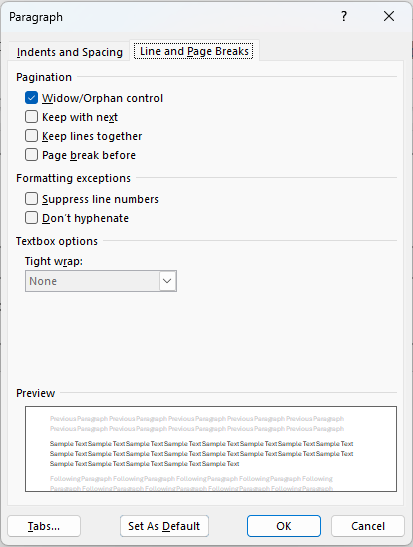
Line and Page Breaks
The Line and Page Breaks tab has options to control how text flows across lines and pages. These are useful for managing layout in long documents keeping content together, avoiding awkward breaks, and managing layout in long documents.
-
| Option |
What it does |
| Pagination |
| Widow/Orphan control |
Prevents a line of a paragraph from appearing alone at the top of a page (a widow) or at the bottom of a page (an orphan). When turned on paragraphs will stay together, moving down to the next page rather than splitting across pages. This is helpful to avoid awkward breaks in text. |
| Keep with next |
Keeps the current paragraph on the same page as the next one after it. You would most likely want to apply this to headings or content that you don't want showing at the bottom of a page without the content that follows it. |
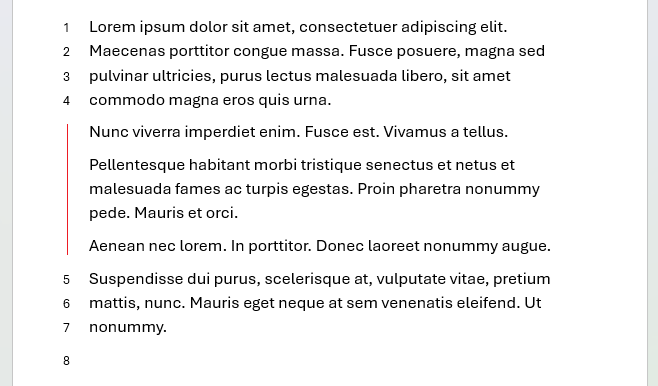
| Keep lines together |
Prevents any part of a paragraph from splitting across pages. This is useful for anything that needs to be read as a whole like a quote or important lists. |
| Page break before |
Forces a page break before the selected paragraph. You would want to use this for chapter titles, section breaks, or any topics that should start on a new page. |
| Formatting exceptions |
| Suppress line numbers |
This requires line numbers to be turned on which can be done via Layout > Line numbers drop down menu. This options lets you suspend line numbers for a paragraph. This is commonly used in legal documents, scripts and technical reviews.
|
| Don't hyphenate |
Prevents words breaking with hyphens at the end of lines. |
| Textbox options |
| Tight wrap |
Tight wrap is normally greyed out in Western-language documents because it only applies to East Asian text layouts. This type of 'wrap' is different to text wrapping around images. This is a legacy setting used for vertical or grid-based writing in languages like Japanese, Chinese, or Korean. When enabled it tightens character spacing to fit the document grid better. In modern Word the visual effect is subtle but it reflects traditional publishing layout behavior.

|
Found this useful? Share it with others.