Here's what this article covers about indents:
- Indenting
- Indenting from the ribbon
- Indenting with Paragraph Options
- Indenting with the ruler
- Lists and indents
- Table lists and indents
- Tab stops
Whare are indents?
Indents are the amount of space between the margin and where a text begins. It’s a formatting setting that controls the starting position of one or more lines in a paragraph.
Increasing an indent moves the entire paragraph inward away from the margin; decreasing an indent moves the paragraph closer to the margin. Indents are set using the markers on the ruler or the Paragraph settings.
Indenting from the ribbon
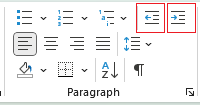
There are two buttons under Home > Paragraph > Increase/Decrease Indent which allow you to increase or decrease an indent:
Indenting with Paragraph Options
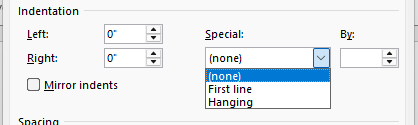
For beginners one feature to consider is the Paragraph Options which allow you to apply left and right indentation to a selected paragraph(s), see here for more: Paragraph Options - Indentation.
Indenting with the ruler
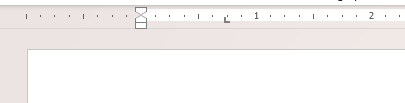
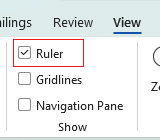
You can also adjust indents with indent markers on the ruler tool. You'll first need to enable to the ruler; go to View > Show and check Ruler and you'll see vertical and horizontal rulers appear on the screen.

Each of these indent markers have different jobs when working with paragraphs:
 |
First line indent - Controls where the first line of the paragraph begins. |
 |
Hanging Indent - Controls where all lines except the first line begin. |
 |
Left Indent - Moves both the above indents together, shifting the entire paragraph left or right. |
Here's a demonstration of all of them in action:

Try it out: Indent Markers and paragraphs
Adjust the sliders to see how the different indent markers interact with a paragraph of text.
Lorem ipsum dolor sit amet, consectetuer adipiscing elit. Maecenas porttitor congue massa…
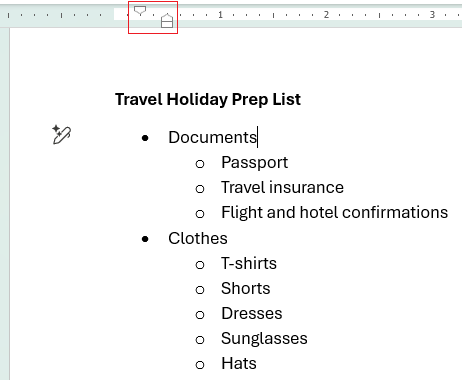
Lists and indents
When it comes to bullet and number lists, the indent markers work slightly differently. They're not aligned like in paragraphs and this is to do with the different functions they have for lists.
|
First line indent - Controls where bullet/number begins. |
|
Hanging Indent - Controls where the text begins after the bullet. |
|
Left Indent - Moves both the above indents together, shifting both the bullet/number and line/paragraph left or right. |
Here's a simple example adjusting the bullet and spacing on a single sub-bullet. Typically you'd adjust all the sub-bullets together, in which case you'd select them all first then drag the indent markers as needed.
Try it out: Indent markers and bullet lists
Adjust the sliders to see how the different indent markers interact with bullet/number lists.
If you want to be precise
Word gives you the option to specify the measurements exactly if you need to. Just right click on the bullet/number and select Adjust list indents and you'll be able to adjust in detail as you need it:
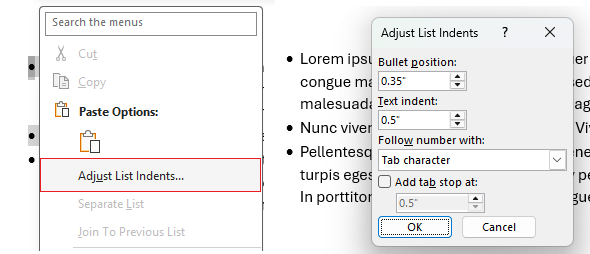
Table lists and indents
If you apply a bullet/number list in a table it'll look something like this below. Word's default spacing jutting out from the column border like that isn't exactly useful when you're typically limited for space in columns, but you can fix this up using the indent markers:
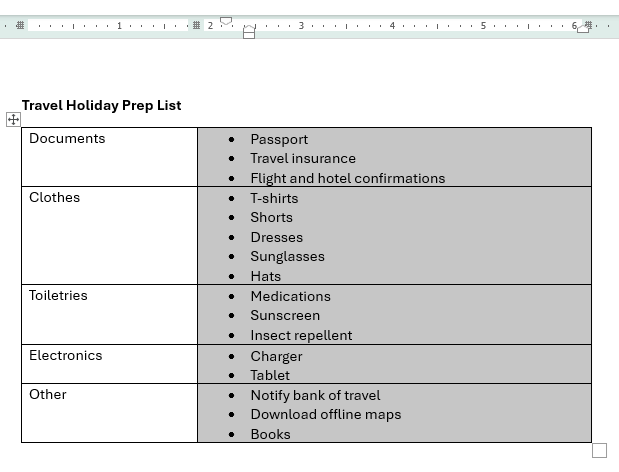
Since it's a list the indent markers will work based on that, but because we're inside a table there's another marker called a Column boundary marker to be aware of too:
|
First line indent - Controls where bullet/number begins. |
|
Hanging Indent - Controls where the text begins after the bullet/number. |
|
Left Indent - Moves both the above indents together, shifting both the bullet/number and line/paragraph left or right. |

| Column boundary marker - Marks the position of a column border in a multi-column table, you can also drag this to adjust the column width. |
Here's a trick to neaten up bullets/numbers in lists:
Adjust the First line indent dragging it right to reduce the space between the bullet/number and the content, then drag the Left indent to the left to bring everything closer to the column border. Take a look:

The column boundary marker can be dragged to adjust the column border as well:
Tab stops
You can set custom alignment points on the horizontal ruler called tab stops that control where the insertion point jumps to when you press the Tab key. This is much better than rather than relying on Word's default half-inch jumps or default left-centre-right alignment. See this article for more about creating custom tab stop alignments in your document Tab stops.